honeywell vision pro 8000 user manual
Honeywell Vision Pro 8000 User Manual: A Comprehensive Guide
Welcome! This manual details the TH8000 series touchscreen thermostat, offering installation, programming, and troubleshooting guidance; Carefully read all instructions before proceeding.
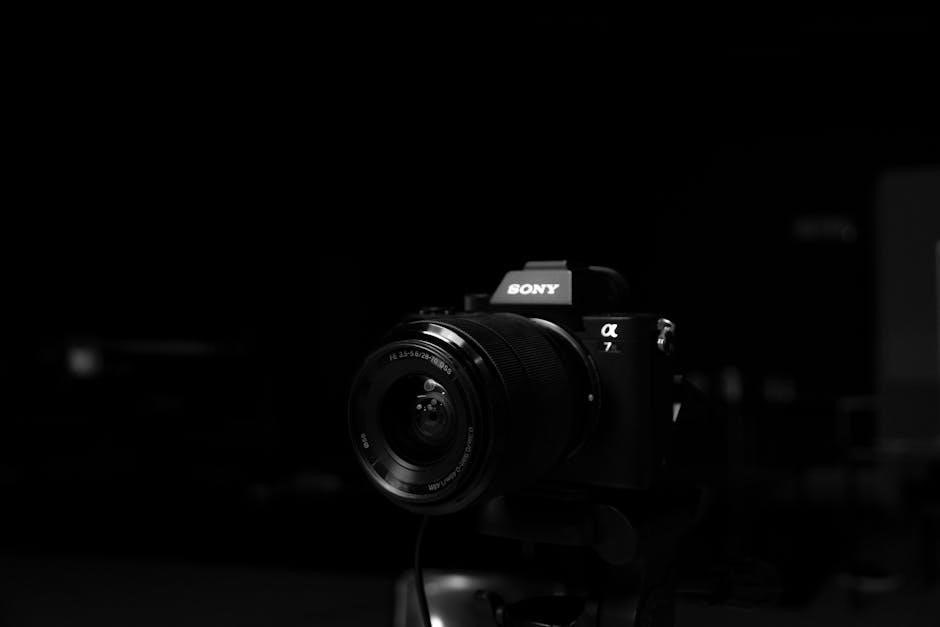
The Honeywell Vision Pro 8000 is a sophisticated, touchscreen programmable thermostat designed for optimal home comfort and energy efficiency. This thermostat, part of the TH8000 series, offers advanced features and intuitive control. It’s crucial to read this manual thoroughly before installation and operation to ensure proper functionality and avoid potential damage.
This guide provides detailed instructions covering everything from pre-installation checklists and wiring diagrams to programming schedules and advanced system diagnostics. Remember to disconnect power before installation to prevent electrical shock. The Vision Pro 8000 is intended for installation by a trained and experienced technician. Copyright 2011 Honeywell International Inc. holds all rights.
Key Features and Benefits
The Honeywell Vision Pro 8000 boasts a vibrant touchscreen interface for easy navigation and programming. Key benefits include customizable schedules, precise temperature control, and potential energy savings. Compatibility with Equipment Interface Modules expands system capabilities. Remote access and control features (where applicable) offer convenience.
The thermostat’s diagnostic tools simplify troubleshooting, displaying error codes for quick identification of issues. Its sleek design integrates seamlessly into any home décor. Always avoid using sharp objects on the touchscreen to prevent damage. This thermostat contains a Lithium battery, potentially with Perchlorate material requiring special handling.
Safety Precautions
Important Safety Information: Disconnect power before installation to avoid electrical shock or equipment damage. Installation should be performed by a trained and experienced technician. Carefully read and follow all instructions to prevent product damage. This thermostat contains a Lithium battery, which may include Perchlorate material requiring careful handling and disposal according to regulations.
Never use sharp objects – pencils or pens – to press touchscreen keys, as this can cause damage. Ensure proper wiring connections and adhere to all electrical safety codes. Failure to follow these precautions could result in injury or malfunction.
Electrical Safety Warnings
Critical Electrical Hazard: Always disconnect power at the breaker or fuse box before installing or servicing this thermostat. Failure to do so presents a serious risk of electrical shock, potentially causing severe injury or death. Do not expose the thermostat to water or moisture. Ensure all wiring connections are secure and comply with local electrical codes.
Improper wiring can lead to short circuits, fire hazards, and equipment damage. If you are unfamiliar with electrical work, consult a qualified electrician. Never attempt repairs beyond those specifically outlined in this manual.
Battery Handling and Disposal (Lithium/Perchlorate)
Important Battery Information: This thermostat contains a Lithium battery, which may contain Perchlorate material. Special handling may be required for disposal due to the potential environmental impact. Do not incinerate, puncture, or disassemble the battery.
Follow all local, state, and federal regulations for proper battery disposal; Contact your local waste disposal authority for guidance. Avoid contact with skin or eyes. If contact occurs, flush thoroughly with water. Keep batteries away from children and pets. Never attempt to recharge the battery.

Installation Guide
Begin installation by verifying the pre-installation checklist is complete and always disconnect power before wiring. A trained technician is required;
Pre-Installation Checklist
Before beginning, ensure compatibility with your HVAC system. Verify you have all necessary tools – screwdrivers, wire strippers, and a level. Disconnect power to the existing thermostat at the breaker to avoid electrical shock. Carefully label all existing wires before disconnecting them; accurate labeling is crucial for correct reconnection. Confirm the thermostat location allows for easy access and is free from direct sunlight or drafts.
Review the wiring diagrams to understand the connections required for your specific system. Ensure the Equipment Interface Module (if applicable) is compatible. Finally, read these instructions thoroughly to prevent product damage and ensure a successful installation.
Wiring Diagrams and Connections
Refer to the detailed wiring diagrams included for your specific HVAC system configuration. Connect wires according to the labeled terminals – Rh, Rc, W, Y, G, C, etc. The ‘C’ wire (common wire) is often required for consistent power. Relay outputs and inputs do not function when using an Equipment Interface Module. Ensure all connections are secure and wires are properly stripped.
Double-check wiring against your previous thermostat’s setup, using your labels. Incorrect wiring can damage the thermostat or HVAC equipment. If unsure, consult a trained, experienced technician. Always disconnect power before making any wiring changes.
Relay Outputs and Inputs Considerations
Understand that the thermostat’s relay outputs and inputs are deactivated when an Equipment Interface Module (EIM) is utilized. This is a crucial consideration during installation and troubleshooting. When employing an EIM, control signals are managed through the module, bypassing the direct relay functionality of the VisionPro 8000.
Carefully review your system’s configuration to determine if an EIM is present. Incorrect assumptions about relay operation can lead to system malfunctions. Always disconnect power before inspecting or modifying wiring related to relay outputs and inputs.
Powering On and Initial Setup
After completing the wiring connections, restore power to the thermostat. The VisionPro 8000 will initiate a startup sequence, displaying the Honeywell logo and then prompting for initial configuration. Carefully follow the on-screen instructions to set the date and time accurately. This is essential for proper scheduling functionality.
The thermostat may also guide you through selecting your system type (e.g., forced air, heat pump). Ensure you choose the correct option for optimal performance. Refer to the wiring diagrams if you are unsure about your system configuration.

Understanding the Touchscreen Interface
The VisionPro 8000 features an intuitive touchscreen. Avoid sharp objects; use your fingertip to navigate menus and access various thermostat functions easily.
Navigating the Main Menu
Accessing the Main Menu is simple: gently touch the screen to activate it. From the home display, you’ll find icons representing key functions like Schedule, Temperature, System, and Settings. Each icon provides access to a dedicated submenu.
Menu Structure: The menu is logically organized for easy navigation. Use the touchscreen to scroll through options within each submenu. A “Back” or “Return” option is typically available to move to the previous screen. Be mindful not to use sharp objects like pens or pencils, as this can damage the touchscreen. Always use your fingertip for interaction. Explore each section to familiarize yourself with the thermostat’s capabilities.
Icon Definitions and Functions
Understanding the Icons: The Honeywell Vision Pro 8000 utilizes intuitive icons for quick access to features. The Schedule icon (often a calendar) allows programming heating/cooling times. The Temperature icon (thermometer) adjusts setpoints. System (fan/snowflake) controls operating mode – Heat, Cool, Auto, Off. Settings (gear) manages device configuration, date/time, and advanced options.
Functionality: Tapping an icon opens its corresponding menu. Within each menu, further options are presented. Remember to use your fingertip to avoid touchscreen damage. Explore each icon to understand its specific functions and customize your comfort settings. Refer to the manual for detailed explanations of each setting.
Touchscreen Sensitivity and Care
Maintaining Responsiveness: The Vision Pro 8000’s touchscreen is designed for reliable performance. However, avoid excessive force. Always use a gentle touch with your fingertip. Important: Never use sharp objects like pencils or pens, as these can permanently damage the screen. Clean the touchscreen regularly with a soft, dry cloth to remove dust and fingerprints.
Calibration: If the touchscreen becomes unresponsive, a soft reset may help. If issues persist, consult the troubleshooting section. Avoid exposing the thermostat to extreme temperatures or humidity. Proper care ensures optimal touchscreen sensitivity and longevity, providing a seamless user experience.

Programming Your Thermostat
Get Started: Easily customize your comfort! This section guides you through setting the date, time, creating schedules, and adjusting temperature setpoints for optimal control.
Setting the Date and Time
Accurate timekeeping is crucial for proper scheduling. From the main menu, navigate to the settings icon – typically represented by a gear or wrench. Select “Date and Time” from the options presented. You’ll then be able to adjust the month, day, and year.
Next, set the current time, ensuring you correctly indicate AM or PM. The Vision Pro 8000 utilizes a 24-hour clock format as well, offering flexibility. Save your changes; the thermostat will automatically update its internal clock. Incorrect date or time settings will affect programmed schedules, so double-check your entries!
Creating and Editing Schedules
The Vision Pro 8000 excels in programmable scheduling. Access the “Schedule” option from the main menu. You can create unique schedules for each day of the week, or copy a schedule to multiple days for convenience. Define “Wake,” “Leave,” “Return,” and “Sleep” periods, setting desired temperatures for each.
To edit, select the specific day and time period. Adjust the temperature setpoint as needed. The “Programming at a Glance” overview provides a quick visual representation of your current schedule. Save changes after each adjustment to ensure they are implemented correctly.
Programming at a Glance Overview
The “Programming at a Glance” feature offers a simplified, visual representation of your weekly heating and cooling schedule. This overview displays each day of the week, showing the programmed temperature setpoints for “Wake,” “Leave,” “Return,” and “Sleep” periods. It allows for quick identification of scheduled events and temperature settings.
Use this view to easily spot any inconsistencies or areas needing adjustment. Tapping on a specific day or time period within the overview will directly access the corresponding schedule editing screen, streamlining the programming process. It’s a powerful tool for efficient schedule management.
Temperature Setpoints and Hold Options
Setting desired temperatures is central to thermostat operation. The VisionPro 8000 allows precise temperature setpoints for each programmed period (Wake, Leave, Return, Sleep). You can adjust these using the touchscreen interface, ensuring optimal comfort and energy efficiency.
“Hold” options temporarily override the programmed schedule. “Permanent Hold” maintains the set temperature indefinitely until manually changed. “Temporary Hold” reverts to the scheduled program at the next scheduled period change. These features provide flexibility for unexpected schedule deviations or immediate comfort adjustments.

Advanced Features
Explore enhanced capabilities! This thermostat supports Equipment Interface Modules and, potentially, remote access. Utilize system diagnostics for efficient troubleshooting.
Equipment Interface Module Compatibility
Expanding System Integration: The Honeywell Vision Pro 8000 demonstrates compatibility with various Equipment Interface Modules (EIMs). These modules facilitate connection to diverse heating and cooling systems, extending the thermostat’s functionality beyond standard configurations. However, it’s crucial to note that the relay outputs and inputs do not function when an EIM is utilized.
Proper EIM selection is paramount for optimal performance. Consult the specific EIM documentation to ensure compatibility with your existing HVAC equipment. Incorrect module selection can lead to system malfunctions. A trained and experienced technician should handle the installation and configuration of any EIM to guarantee safe and reliable operation. Always disconnect power before installation to avoid electrical shock.
Remote Access and Control (if applicable)
Connectivity Options: While specific models of the Honeywell Vision Pro 8000 may offer remote access capabilities, this functionality isn’t universally standard across the TH8000 series. If your model supports remote control, it typically involves connecting the thermostat to your home’s Wi-Fi network.
This connection enables control via a dedicated Honeywell Home mobile app, allowing adjustments to temperature settings, schedules, and system modes from anywhere with an internet connection. Refer to the separate Honeywell Home app documentation for detailed setup instructions and features. Ensure a secure Wi-Fi network for optimal performance and data protection.
System Diagnostics and Troubleshooting
Error Code Interpretation: The Honeywell Vision Pro 8000 features built-in diagnostics to identify potential system issues. The thermostat displays error codes to indicate specific problems, such as communication failures or sensor malfunctions. Consult the comprehensive error code list within this manual (or online resources) to decipher the meaning of each code.
Troubleshooting Steps: Common solutions include verifying wiring connections, checking battery levels, and ensuring proper equipment interface module compatibility. If an error persists, disconnect power, and contact a qualified HVAC technician for assistance. Never attempt repairs beyond your expertise.
Error Codes and Their Meanings
Decoding System Alerts: The Vision Pro 8000 utilizes a series of error codes to communicate system faults. For example, a communication error might display as “COMM FAIL”, indicating a wiring issue with connected equipment. Sensor errors, like a faulty temperature probe, could present as “SENSOR ERR”.
Refer to the Table: A detailed table listing all potential error codes and their corresponding meanings is crucial for effective troubleshooting. This table explains the likely cause of each error and suggests initial corrective actions. Always prioritize safety – disconnect power before investigating wiring or components.

Maintenance and Care
Keep it Clean: Regularly clean the touchscreen with a soft cloth. Replace batteries as needed, handling Lithium/Perchlorate types with appropriate care and disposal methods.
Cleaning the Touchscreen
Gentle Cleaning is Key: To maintain optimal touchscreen responsiveness and clarity, regular cleaning is recommended. Important: Never use sharp objects – pencils, pens, or similar items – to interact with the touchscreen. Always utilize your fingertip to press keys, preventing potential damage to the display surface.
For cleaning, a soft, dry cloth is generally sufficient to remove dust and fingerprints. If necessary, lightly dampen the cloth with water only; avoid using harsh chemicals, abrasive cleaners, or excessive moisture. Ensure the thermostat is powered off before cleaning. After wiping, thoroughly dry the touchscreen to prevent any water spots or residue. Consistent, gentle cleaning will prolong the life and functionality of your Honeywell Vision Pro 8000’s touchscreen interface.
Battery Replacement
Important Battery Information: Your Honeywell Vision Pro 8000 thermostat contains a Lithium battery, which may include Perchlorate material. Special handling may be required for disposal, adhering to local regulations. The battery powers the thermostat’s clock and programmed settings during power outages.
When the low battery icon appears on the touchscreen, replace the battery promptly to avoid losing your settings. Refer to the detailed instructions within this manual for the specific battery type and replacement procedure. Always disconnect power before attempting battery replacement. Proper battery handling and disposal are crucial for safety and environmental responsibility.

Technical Specifications
Model Series: The Vision Pro 8000 is part of the TH8000 series, covered by US Patent No. 6595430 and Design Patent D5091.
Model Numbers (TH8000 Series)
Understanding the TH8000 Family: The Honeywell Vision Pro 8000 thermostat encompasses a range of model numbers within the TH8000 series. These variations cater to diverse heating and cooling system configurations and feature sets. Key models include the TH8320WF, TH8321WF, and potentially others depending on regional availability and specific functionalities.
Each model number signifies specific capabilities, such as Wi-Fi connectivity (indicated by “WF”), compatibility with certain equipment interface modules, and advanced programming options. Refer to the packaging or the thermostat’s settings menu to identify your exact model. Proper identification is crucial for accessing relevant support resources and ensuring optimal performance. The manual itself is designated 69-1894EFS03.
Patent Information (US Patent No. 6595430, D5091)
Intellectual Property Rights: Honeywell International Inc. holds patents protecting the innovative technology incorporated into the Vision Pro 8000 thermostat. Specifically, US Patent No. 6595430 and Design Patent No. D5091 cover aspects of the thermostat’s design and functionality. These patents demonstrate Honeywell’s commitment to research and development in the field of home comfort control.
This intellectual property safeguards the unique features and user experience offered by the TH8000 series. Unauthorized reproduction, modification, or distribution of this technology is strictly prohibited. Copyright 2011 Honeywell International Inc. retains all rights, ensuring continued innovation and quality in their product offerings.

Resources and Support
Need help? Contact Honeywell Customer Care or explore online FAQs. Image-to-PDF conversion tools are available for manual access and assistance.
Honeywell Customer Care Contact Information
For assistance with your Honeywell VisionPro 8000 thermostat, please reach out to Honeywell Customer Care. They are equipped to handle a wide range of inquiries, from basic operational questions to more complex troubleshooting scenarios. You can register your product for enhanced support services. Contact them directly for personalized assistance with installation, programming, or any error codes you may encounter. Their dedicated team is available to ensure you get the most out of your thermostat. Don’t hesitate to utilize their expertise for a seamless experience. Further details and contact numbers can be found on the Honeywell Home website.
Online Resources and FAQs
Explore a wealth of helpful resources online! Honeywell provides extensive FAQs addressing common questions about the VisionPro 8000. Numerous online forums, like r/hvacadvice, feature discussions and user experiences with the thermostat, offering valuable insights and potential solutions. Image to PDF conversion tools are readily available for easily digitizing manual pages. These tools support various formats like JPEG and PNG. Discover tutorials and guides to optimize your thermostat’s performance. Utilize these digital resources to enhance your understanding and troubleshoot issues independently. Access detailed information and community support for a comprehensive user experience.
Image to PDF Conversion Tools (Related to Manuals)
Digitize your manual with ease! Several online tools convert images – BMP, GIF, JPEG, PNG, TIFF, and more – into PDF format. These are invaluable for archiving or sharing sections of the Honeywell VisionPro 8000 manual. PDF24 and similar services allow merging multiple images into a single PDF document, streamlining organization. No software installation or signup is typically required, offering convenient access. Convert JPG images quickly and freely. This functionality is particularly useful for creating portable, searchable copies of troubleshooting guides or wiring diagrams, ensuring information is always accessible.

Frequently Asked Questions

Find quick answers! Common questions include battery requirements for the TH8321 model and comparisons between the VisionPro 8000 and the T9 thermostat.
Does the TH8321 require batteries?
Battery Dependence Varies: The need for batteries in the TH8321 model depends on its specific configuration and usage. Discussions online, particularly within the r/hvacadvice community, frequently address this question. A blank TH8321 thermostat, as observed by users, may initially appear to not require batteries.
However, batteries are crucial for maintaining the thermostat’s memory and settings during power outages or when the system is disconnected. Without batteries, programmed schedules and personalized preferences could be lost. Always consult the full installation guide for detailed information regarding your specific TH8321 setup and battery requirements to ensure optimal functionality.
VisionPro 8000 vs. T9 Comparison
Feature and User Experience: Online discussions, specifically on r/hvacadvice, often compare the Honeywell VisionPro 8000 to the T9 thermostat. Users frequently highlight the VisionPro 8000’s comprehensive touchscreen interface and advanced programming capabilities. The T9, while offering smart features, is often perceived as simpler in functionality.
The VisionPro 8000 caters to users desiring granular control over their HVAC systems, including detailed scheduling and equipment interface module compatibility. The T9 focuses on ease of use and remote access. Choosing between the two depends on individual needs and technical expertise, with the VisionPro 8000 suiting more complex setups.